How to Use GitHub Actions with R to Run Code Automatically
In my course, Using Git and GitHub with R, I talk about GitHub Actions as one of the best reasons to use GitHub. GitHub Actions is a way for you to run code automatically, without you having to touch your computer. Maybe you run a survey and you want to pull the data every day. Or perhaps you want to generate a weekly report. Instead of manually running code in RStudio, you can use GitHub Actions to run this code automatically.
Below, I will demonstrate two GitHub Actions: one that imports data from a Google Sheet and another that generates a report using this data. But first, what exactly are GitHub Actions?
What are GitHub Actions?
GitHub Actions are, at their core, a way to get your code to run automatically on a virtual computer in the cloud that GitHub maintains. To make this happen, you need to write out a set of instructions to:
Tell the code when it should run
Start a virtual computer
Install R
Install all packages you need to run your code
Run your code
When you work on your own computer, you do all of these things manually. You choose an operating system, install R, install packages, and run code on your schedule (that is, when you manually run it). But because you are working on a virtual computer that runs without you, you need to provide details for exactly what should happen. These instructions are provided in a YAML file that GitHub Actions uses to run your code. It can be tricky to get GitHub Actions to work correctly, but once it does, you’ll experience the joy of watching your code run without you lifting a finger.
Before we work with GitHub Actions, let’s imagine we have some survey data. I’ve created a simple survey that asks where people live.
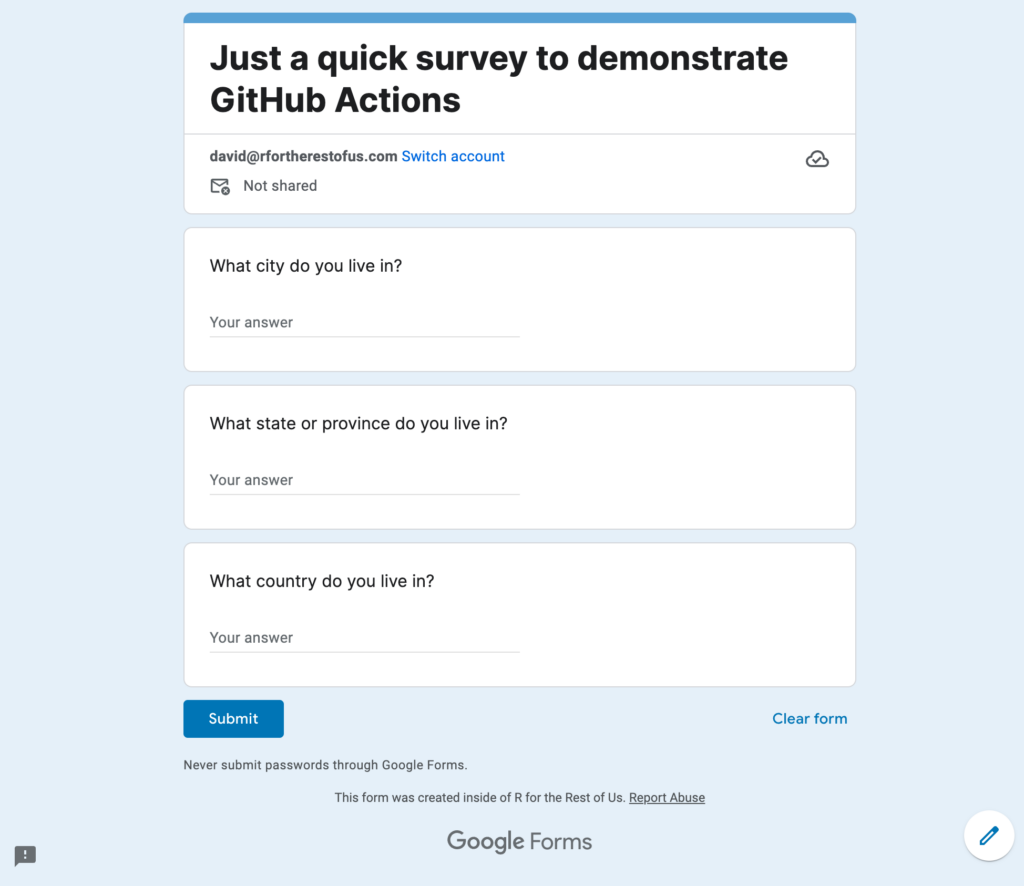
The results of this survey are piped into a Google Sheet, which we can access using the googlesheets4 package.
Here’s some code that reads in the data in the Google Sheet and saves it to a file called survey_data.rds.
library(tidyverse)
library(googlesheets4)

# The data is publicly available so we don't need to authenticate
gs4_deauth()

survey_data <- read_sheet("https://docs.google.com/spreadsheets/d/13kfPtyQP1xmL4Rn6rfJHgJcAblfH7pxS5RvdmGe6BHg/edit?usp=sharing")

survey_data %>%
write_rds("survey_data.rds")I’ve saved this code to a file called import-data.R. I could run this each time I want to import the data, but wouldn’t it be nice if the data could be imported without me having to do anything? Enter GitHub Actions.
How GitHub Actions Work
GitHub Actions works through YAML files placed in the .github/workflows directory. These YAML files contain a set of instructions that tell the virtual computer what to do. Here’s an example of a YAML file that triggers a GitHub Action.
on:
  push:
    branches: main

jobs:
  import-data:
    runs-on: ubuntu-latest
    steps:
      - name: Set up R
        uses: r-lib/actions/setup-r@v2

      - name: Install packages
        uses: r-lib/actions/setup-r-dependencies@v2
        with:
          packages: |
            any::tidyverse
            any::googlesheets4

      - name: Check out repository
        uses: actions/checkout@v3

      - name: Import data
        run: Rscript -e 'source("import-data.R")'

      - name: Commit results
        run: |
          git config --local user.email "[email protected]"
          git config --local user.name "GitHub Actions"
          git add survey_data.rds
          git commit -m 'Data updated' || echo "No changes to commit"
git push origin || echo "No changes to commit"YAML files are notoriously finicky with regard to spacing. Each indentation you see above is done with two spaces (not tabs). Follow this pattern to avoid headaches.
Triggers Start GitHub Actions
To use a GitHub Action, you need to specify when it should run. The top section of the YAML file specifies the trigger to start the GitHub Action. Our YAML file says to run the action whenever we push code from the main branch to GitHub.
on:
  push:
branches: mainLater, I’ll demonstrate a more common pattern: running code on a schedule using what are known as cron jobs, but running code whenever you push to GitHub is a good way to test that things are working.
Jobs Lay Out the Steps to Run When the Action is Triggered
The second (and much larger) section specifies what should happen when the trigger starts the GitHub Action running. Under jobs, we first have to give a name to the series of steps that will follow. I’m calling mine import-data. On the following line, runs-on: ubuntu-latest indicates that my action will run on a virtual computer using the latest version of the Ubuntu distribution of Linux (you can also use Mac OS and Windows).
jobs:
  import-data:
runs-on: ubuntu-latestNext, under steps, we lay out what should happen on the virtual computer we’ve spun up. Remember that this is a virtual computer GitHub maintains and so it does not have any software installed on it. As a result, we need to install R as well as any packages we need to run our code. Fortunately for us, there are many preexisting GitHub Actions that others have created that we can use. The first step uses one of these, running code to install R.
steps:
  - name: Set up R
uses: r-lib/actions/setup-r@v2You’ll see throughout that we name each step (the first step is called “Set up R”) and then the uses line points to an existing GitHub Action.
The next step installs packages we need. It starts by using a pre-written action that installs any dependencies (software needed to run R packages) and then the section under with specifies the specific packages we want to install.
- name: Install packages
  uses: r-lib/actions/setup-r-dependencies@v2
    with:
      packages: |
        any::tidyverse
any::googlesheets4The next step uses git to check out our repository onto the virtual computer we’re using.
- name: Check out repository
uses: actions/checkout@v3The Import data step looks a bit different. That’s because we’re not relying on GitHub Actions created by others, but rather telling the virtual computer to execute the code we’ve written. The run line tells the virtual computer to run the code in the import-data.R file that we created above.
- name: Import data
run: Rscript -e 'source("import-data.R")'The import-data.R ends with an RDS file being saved. If we end our GitHub Action here, an RDS file will be created on the virtual computer we’re borrowing from GitHub. But once the action completes, the virtual computer is turned off and the RDS is lost. So, to make sure we have it available, we want the GitHub Action to add the data to our repository as a new a commit. The final step does just this.
First we set the email and username to be used for this commit. Then we add survey_data.rds to our commit. The line that starts with git commit sets our commit message. If there is new data, the message is “Data updated”; if there is no new data, the message is “No changes to commit” (the || separates the two options). Finally, the commit is pushed to GitHub (if there is new data) or the message “No changes to commit” is printed (if there is not).
- name: Commit results
    run: |
      git config --local user.email "[email protected]"
      git config --local user.name "GitHub Actions"
      git add survey_data.rds
      git commit -m 'Data updated' || echo "No changes to commit"
git push origin || echo "No changes to commit"Running Code on a Schedule with Cron Jobs
Above, our GitHub Action was triggered to run whenever we pushed code to GitHub on the main branch. This is useful when we’re testing, but a more realistic approach would be to have the code run on a set schedule. We can do this using what are known as cron jobs. We can change the trigger section to this:
on:
  schedule:
- cron: '0 12 * * *'The line cron: '0 12 * * *' specifies that our code will run every day at 12:00pm (in the UTC time zone). The syntax used to specify the time may look like nonsense, but the website crontab guru is helpful to convert it into English (ChatGPT can also help you create cron expressions). Now, when you push your code to GitHub, the action will no longer run. However, every day at 12:00pm UTC, it will!
Using GitHub Actions to Keep a Report Always Up to Date
I recognize that the data importing example is overly simplistic (bringing in a few survey responses and saving them as an RDS file is hardly worth the effort of setting up a GitHub Action). Let’s use an example of something you might actually want to do using GitHub Actions: keeping a report on survey data always up to date.
To show this, I’ll create a Quarto document that imports the data and generates a report. Here’s my code, which you will see is nearly identical to the import-data.R file, except that it makes a table at the end using the gtpackage.
---
title: "Report"
format: html
execute:
  echo: false
  warning: false
  message: false
---

```{r}
library(tidyverse)
library(googlesheets4)
library(gt)
```

Report last updated `r now()`.

```{r}
gs4_deauth()

survey_data <- read_sheet("https://docs.google.com/spreadsheets/d/13kfPtyQP1xmL4Rn6rfJHgJcAblfH7pxS5RvdmGe6BHg/edit?usp=sharing")

survey_data %>%
  gt()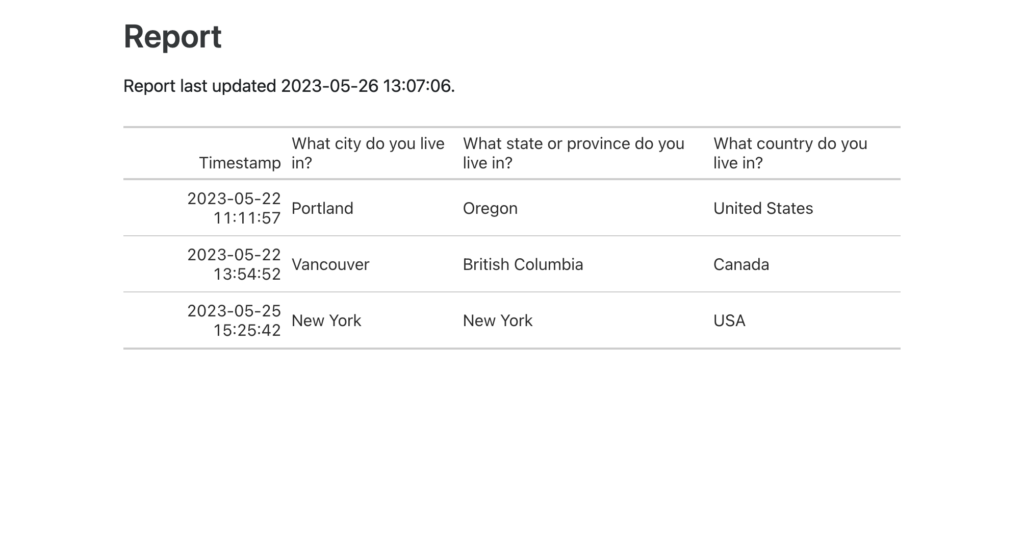
```The resulting report looks like this:
The report is an HTML file, which means that we can host it using a static site host such as GitHub Pages or Netlify. I like Netlify because it is easy to use and updates are super fast. To use Netlify, we will first run quarto publish in the terminal. We’ll choose Netlify as our provider (you’ll also need to authenticate in your browser the first time you do this).
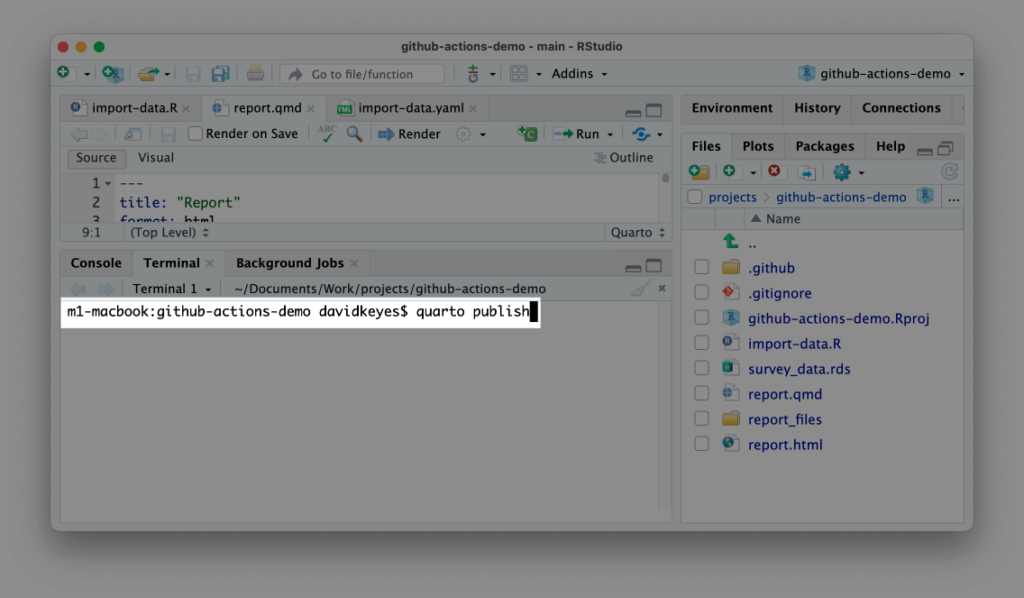
This creates a new site on Netlify and uploads our report to it.
Doing this will also create a _publish.yml file that contains information needed to publish the site using GitHub Actions. We can now create a YAML file to render our report and publish it on Netlify. The YAML file below does just this. And you’ll see that it is nearly identical to the YAML file we created above.
on:
  push:
    branches: main

jobs:
  update-report:
    runs-on: ubuntu-latest
    steps:
      - name: Set up R
        uses: r-lib/actions/setup-r@v2

      - name: Install packages
        uses: r-lib/actions/setup-r-dependencies@v2
        with:
          packages: |
            any::tidyverse
            any::googlesheets4
            any::gt

      - name: Set up Quarto
        uses: quarto-dev/quarto-actions/setup@v2

      - name: Check out repository
        uses: actions/checkout@v3

      - name: Render and Publish to Netlify
        uses: quarto-dev/quarto-actions/publish@v2
        with:
          target: netlify
NETLIFY_AUTH_TOKEN: ${{ secrets.NETLIFY_AUTH_TOKEN }}In the Install packages step, we have added the gt package, which we use to create our table. There is an additional step called Set up Quarto, which installs Quarto in the same way that the Set up R step installs R. The last step, Render and Publish to Netlify, is where we, well, render the report and publish it to Netlify.
- name: Render and Publish to Netlify
  uses: quarto-dev/quarto-actions/publish@v2
    with:
    target: netlify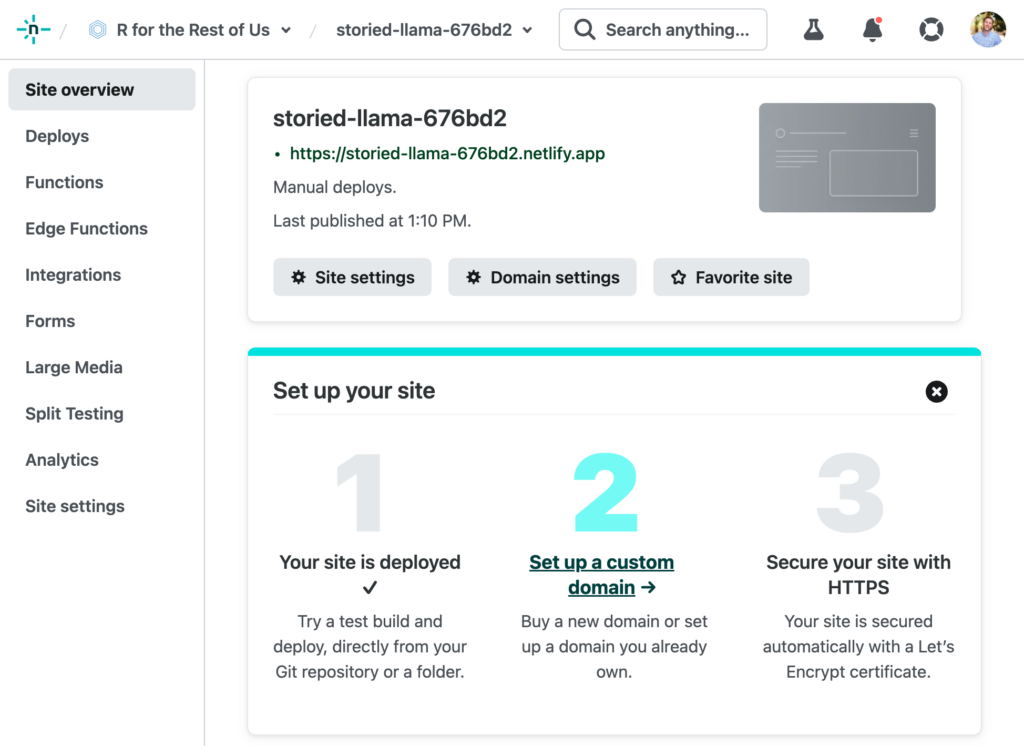
NETLIFY_AUTH_TOKEN: ${{ secrets.NETLIFY_AUTH_TOKEN }}The last line has something we haven’t seen before. The NETLIFY_AUTH_TOKEN is a variable that we need to create in order to allow the Linux computer we’re using in our GitHub Action to publish to Netlify. To create the NETLIFY_AUTH_TOKEN variable, we need to first go to the Netlify applications page and click on New Access Token.
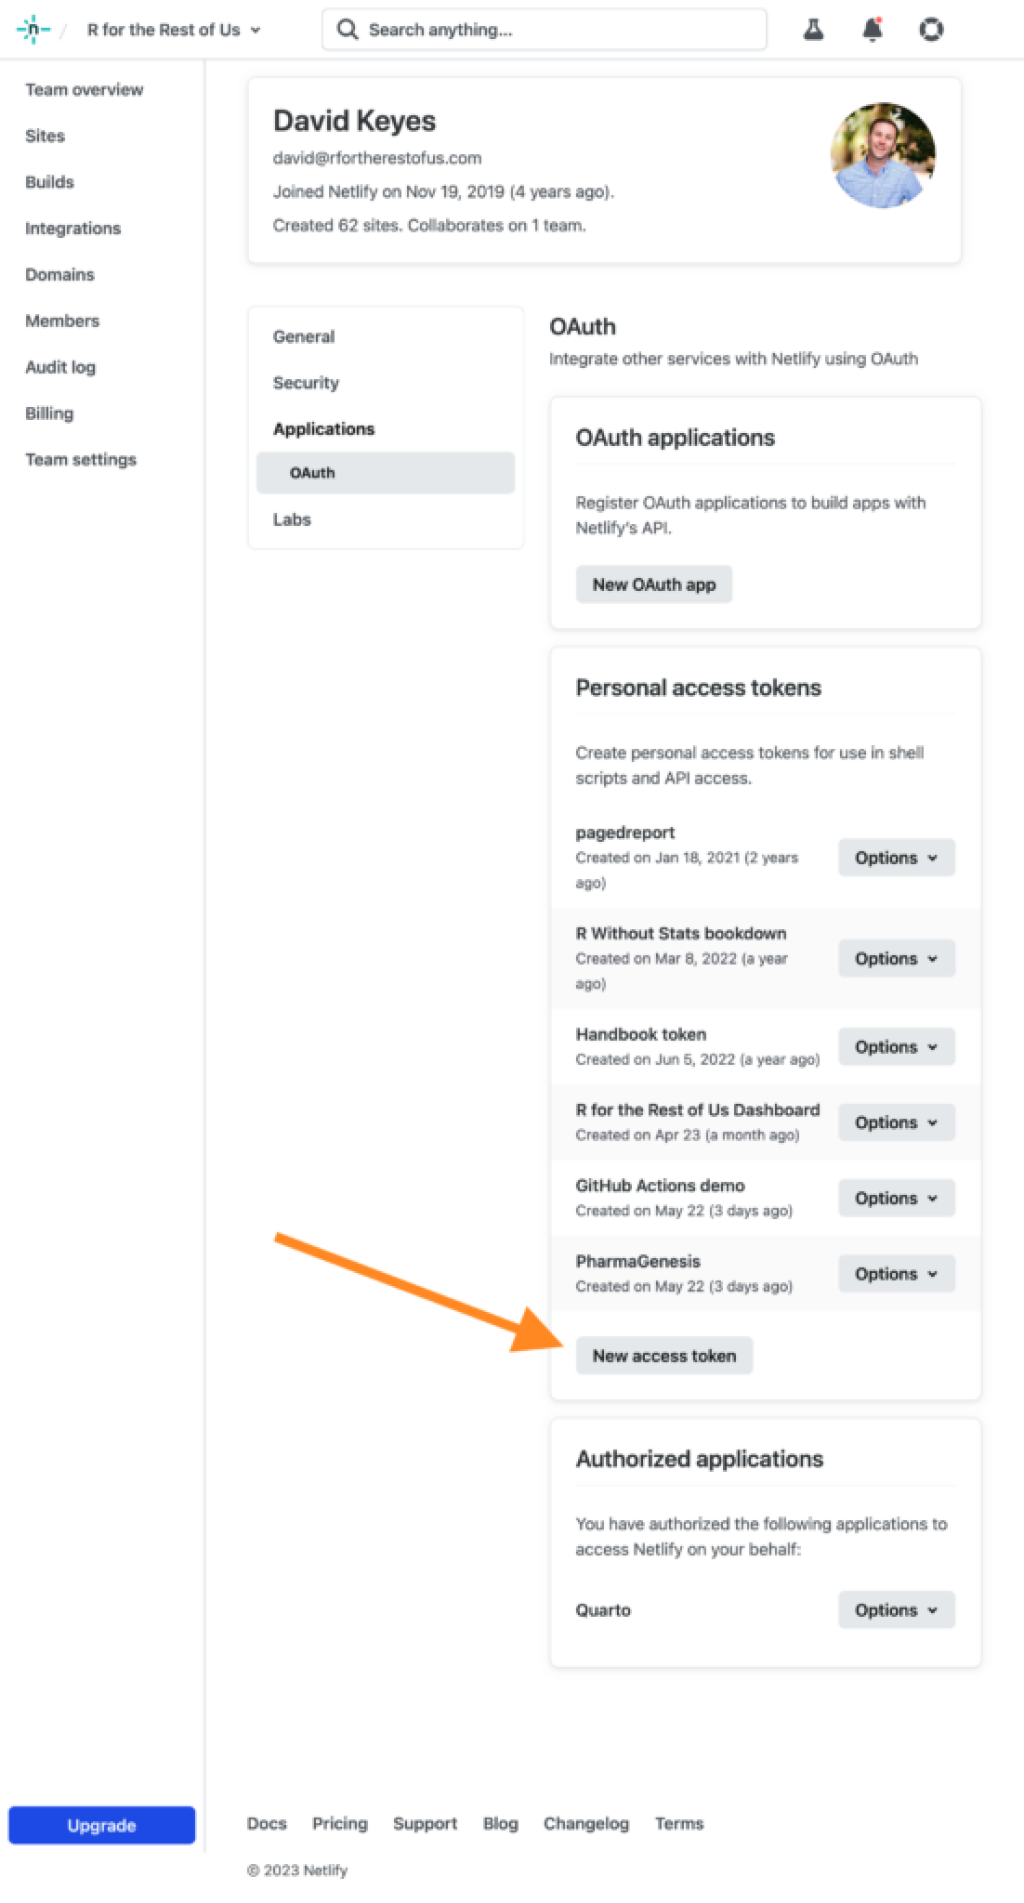
Once we’ve created this, we then need to save it in our GitHub repository. We do this by going to Settings > Secrets and Variables > Actions. Click New Repository Secret and enter NETLIFY_AUTH_TOKEN where it says YOUR_SECRET_NAME and the token itself in the larger box below.
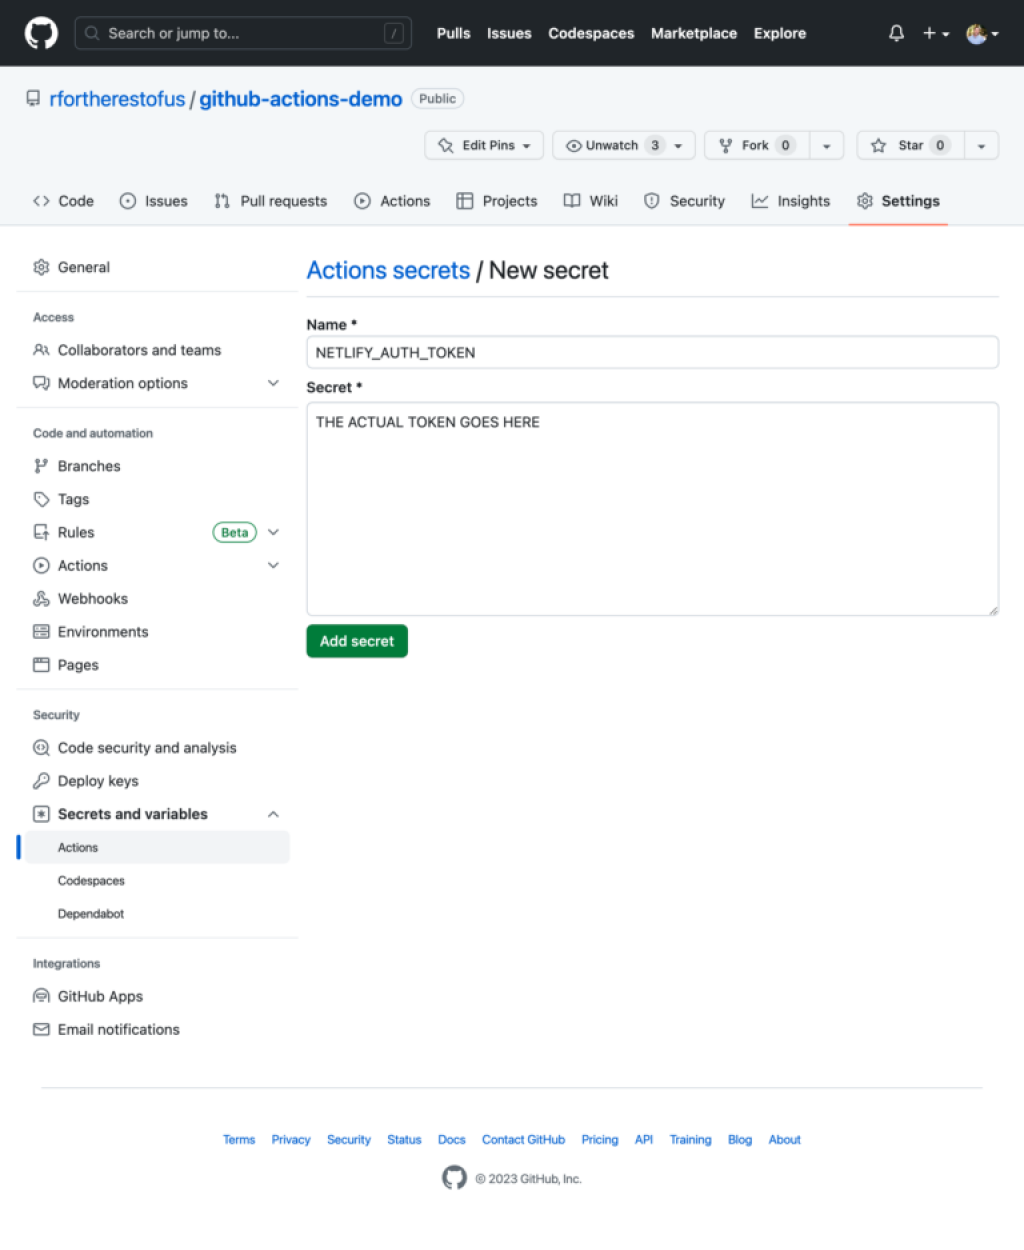
GitHub repositories allow you to create secrets, which is how you can save variables that are then used in GitHub Actions. The line NETLIFY_AUTH_TOKEN: ${{ secrets.NETLIFY_AUTH_TOKEN }} tells GitHub Actions to define a variable called NETLIFY_AUTH_TOKEN as the contents of the secret called NETLIFY_AUTH_TOKEN. This variable is used in the Render and Publish step in order to authenticate with Netlify (without it, our GitHub Action would not be allowed to publish on Netlify).
Now, when I push to GitHub, the report will be rendered and published on Netlify. This means that the URL for our website will always have an up-to-date report will the latest results.
Updating Our Report on a Schedule
As with the data importing above, we’re more likely to want to run this GitHub Action on a schedule than at each push. To do this, you could change the trigger step so that it runs, say, every five minutes:
on:
  schedule:
- cron: '*/5 * * * *'If I go in now and enter a new response into my survey, wait five minutes, and refresh the URL that Netlify has created for me, my report will contain the new data. And, best of all, I didn’t have to do anything!
Conclusion
People often ask me why they should use GitHub for collaboration when they can just as easily use something like Dropbox. There are many answers to this question (and I answer them in my course, Using Git and GitHub with R), but GitHub Actions is one of the most compelling. Being able to run code on its own without you having to lift a finger is something that GitHub can do but Dropbox cannot. If you have not yet been convinced of the need to learn to use GitHub, hopefully this will inspire you to take the plunge!
Sign up for the newsletter
Get blog posts like this delivered straight to your inbox.

You need to be signed-in to comment on this post. Login.